Note to self: when deploying the chute on a twin-T Lambo....expect a violent pull to the right.
Wild video. From the comments it sounds like the driver escaped unharmed.
____________
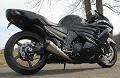
06 ZX14 - Arata exhaust, PC III, McIntosh Ext swingarm, Vortex lowering links, Racetech rear shock, Marc wheels, To be continued...
posted February 09, 2011 11:11 PM
Edited By: gilberjj on 10 Feb 2011 07:16
One of my posts from another forum, just thought I'd share it here too...
Here's a picture of my Gann 2 stage lock-up clutch. It also came with a modified/extended clutch cover, longer bolts, aluminum bolts and washers, 1 gram weights, and light-weight springs (more on this below).
This 2 stage lockup clutch will help get all the power to the ground, extend my clutch life significantly, and can help me achieve a perfect launch every time. But why on earth would I want to run light springs when the bike is making ridiculous power you ask? Well, I'll tell ya! The springs that you bolt down to the pressure plate provide what's called static pressure. These are the springs that come stock with your clutch. The springs visible in the picture control the lockup clutch arms. So, this makes two stages of lockup, static, and the weighted arms. Ideally, when this is set up correctly, the following happens...
I roll up to the pre-stage beams on the christmas tree
Once I trip the pre-stage lights, I stop, select my launch rpm, get my weight forward and on the tank
Very slowly release the clutch and creep into the stage bulbs
As soon as the stage bulbs illuminate, I pull the clutch back in just far enough so the bike won't creep
If I'm running a pro-tree, the yellow lights will flash telling me to GO!
By the time I react, the green bulb will be lit
Here's where the magic of the 2 stage lockup occurs
I dump the clutch and go full throttle simultaneously
Spectators and competitors watch in amazement as the bike rips off a 1.3x 60' time and I fly down the 1/4 mile to a mid 8 second pass.
Normally, if you throw the clutch on a non-wheelie bar bike, you'll end up on your back..... something like this...
So, usually you use the technique called the snap and slide. Your throttle hand does the same thing each and every time, trying to get to wide open throttle (WOT) as soon as possible. The clutch hand does the snap and slide. It's pretty much just what it sounds like, you snap the clutch lever out just a tad to get the bike rolling, and the slide out as quickly as possible without making the bike wheelie or bog. It's a timeless art that is never quite perfected. Here's a video of two of the best (Rickey Gadson and Jeremy Teasley) demonstrating the snap and slide.
Anyway, the 2 stage lockup can do this snapping and sliding if set up correctly. Given with the 2 stage lockup are lighter then stock clutch springs, and lots of 1g weights I can put on lockup arms. The lighter clutch springs allow me to throw the clutch lever without the bike bogging or flipping over because there the lighter springs exert less pressure on the clutch pack and the motor simply drives through it. Ideally, the clutch slips at say, 8,000 rpm. As wheel speed increases, centrifugal force forces the arms onto the pressure plate. This increases the weight applied to the clutches, and the clutch begins to "lock up" instead of slip. The weights, and springs control the lockup, but there are many other factors that come into play such as weight of bike and rider, launch rpm (and whether a 2 step is used or not), length of swingarm, horsepower and torque, traction available, and clutch stack height. There are also multi-stage clutches, and sliders that offer even more stages of lockup, and allow for an even more controlled launch.
I am NOT an expert on this by ANY means, and quite honestly, I'm still trying to get a grasp on this myself. But I'll try to set this up as best I can, and hopefully my bike launches like the pro's bikes! Only time will tell!!
posted February 13, 2011 09:23 PM
I was convinced to sell the begi and stick an aeromotive 1:1 fpr on my bike. I'm still sorting out my fuel system, but I don't see any reason why this bike shouldn't live for a long time. I'm not taking any shortcuts, I lowered the compression, and I'll probably be limited to about 10 psi due to the fuel system on e85. I don't want to run my injectors past 90% cycle duty. I have not been able to get much done recently, but I hope to be tuning this bike soon. Here's the to-do list.
Wire in pcv, LCD, and Wideband commander 2
Finish wiring and installing air shifter
Degree cams with ape adjustable cam sprockets
Reinstall motor
Wire and install gm 3 bar map sensor
Install gann 2 stage lockup clutch
Modify stock fuel rail, or buy rail
Install injectors
Route, cut and install fuel lines, and weldless tank bung
Install aeromotive fpr
Then once the bike is running, get it tuned on e85
Once tuned...
Buy and install swingarm
Buy and install drag shock
posted February 14, 2011 06:40 PM
You will find that the clutch Stack heigth will play a big factor in how the clutch works. With my turbo power it can wear the plates pretty fast. Take your time. Set it up and see how it does. Sure makes it a lot eaiser to ride out of the hole.
posted March 21, 2011 08:40 AM
Edited By: gilberjj on 21 Mar 2011 17:35
Putting together a final build list...
2006 Kawasaki zx14
Motor:
Carpenter heavy duty valve springs
APE adjustable cam gears
Cometic 0.70" head gasket (to raise compression to about 10.29:1)
Gann lock-up clutch
MPS Racing modified clutch cover
Muzzy's PAIR block off plates
Adam's boxed and cut oil pan
OSR oil cooler block off valve
Modified and seals frame for boost
Dynojet PCV with GM 3 bar external map sensor
Turbo Kit:
Cycle-Logic turbo kit
20g turbo with ceramic coated exhaust housing
TiAL 38mm external wastegate (5.8 lb spring)
AEM dry flow air filter
Manual boost controller
Chassis:
zx10r front fender and brackets
Brocks lowering straps and brackets
Soupy's rear lowering links
Tiger Racing undertail
Evil chromoly non-underbraced 8-12" over swingarm
Trac Dynamics revalved shock with Gen II hayabusa spring
190/50-17 Shinko 008 slick
MPS Racing air shifter
To be tuned by Nels at 2 Wheel Dynoworks within a month. I'll make sure to post up a dyno sheet.
quote:Quite a build! Got any new pics? Why did you decide on the unbraced arm? Cost?
Non-braced evil arm. From what I've read and heard, it will be more then strong enough for my application. There's a lot of grudge bikes with a whole lot more power then mine (and a lot longer too), and they seem to be fine without the bracing.
$675 shipped
$600 shipped base price
$40 chainguard
$35 bearings (bushings are included in the base price, but I chose to get new bearings, and have Evil press them in)
This is about $30-$40 under what it normally costs, I did a little wheeling and dealing.
No new pics.
I've seen some pretty "Evil" handling from some of those grudge bikes...like headed over the line, or towards a wall. Sometimes I wonder if those long splindly arms aren't a factor?
posted March 24, 2011 09:06 PM
Update: I'm heading over tomorrow to finish up my bike. I hope to get it started, and as soon as I get my evil arm, it's off to the tuners. YEE HAA!
List of stuff to do..... and it's lengthy
install pcv
finish installing and wiring air shifter
install injectors
fabricate fuel pressure regulator mounts, and install fuel pressure regulator
install weldless tank bung
install walbro fuel pump
install cam gears
install cams
timing cam gears to +5, +5
raise motor back into frame
finish turbo oiling system
fabricate downpipe
fabricate external wastegate piping
install and wire boost gauge
install and wire GM 3 bar map sensor to PCV
install wheels
install new clutch
install Gann lock-up clutch
Needs a life
2012 14r In Blue and no Mods!
Posts: 5428
posted March 25, 2011 03:07 AM
quote:
quote:
quote:Quite a build! Got any new pics? Why did you decide on the unbraced arm? Cost?
Non-braced evil arm. From what I've read and heard, it will be more then strong enough for my application. There's a lot of grudge bikes with a whole lot more power then mine (and a lot longer too), and they seem to be fine without the bracing.
$675 shipped
$600 shipped base price
$40 chainguard
$35 bearings (bushings are included in the base price, but I chose to get new bearings, and have Evil press them in)
This is about $30-$40 under what it normally costs, I did a little wheeling and dealing.
No new pics.
I've seen some pretty "Evil" handling from some of those grudge bikes...like headed over the line, or towards a wall. Sometimes I wonder if those long splindly arms aren't a factor?
My guess it has nothing to do with the arm. I to went with the non under braced arm. don't relly see it doing anythin for me as well.
posted March 25, 2011 07:14 PM
Edited By: billeason on 26 Mar 2011 03:22
coolant mod !!
quote:
quote:Custom cometic head gasket
The next gasket i mod, Bad' I will try and remember to get a picture up . Two small holes and a slight diameter reduction on steam back hole along with a mod to thermostat itself '' will relief that heat bottle neck....................................
Head
[IMG]http://i197.photobucket.com/albums/aa106/gilberjj/zx14/IMG_
see how on the gasket the holes are drilled on the intake ports and then they skip 1 and do the other port on the outside by the cam chain on #4 . I'm beginning to think the coolant flow is coming up from 1,2 and 3 and flowing into the thermostat and blocking off #4 cylinder ,
but i haven't found nobody yet smart enough to figure this theory out yet
posted March 26, 2011 02:47 AM
Edited By: Shane661 on 26 Mar 2011 11:14
I think Chad is running an unbraced 66" arm on his Big Turbo? I would just prefer bracing if I were running a turbo setup, based on having had an unbraced one last year. I think Kawasakijockey is using my old 68" Adams arm on his bike now.
quote:I think Chad is running an unbraced 66" arm on his Big Turbo? I would just prefer bracing if I were running a turbo setup, based on having had an unbraced one last year. I think Kawasakijockey is using my old 68" Adams arm on his bike now.
I am running an unbraced arm and so was Bud Yoder at one point on his pink pro street Busa that has gone 7.11 @ 200+ I noticed he did switch to a braced arm at some point though. Also, I would prefer underbracing but was told by Terry at Mcintosh and Chris Jones that my arm is plenty strong. I was also told that the cheap arms even with underbracing are not as strong as a Mac or an Adams. So my thought is that you get what you pay for in an arm just like anything else.
____________
09' ZX14
I found that I ruined my regulator, but Compton was nice enough to send me 2 more for me to use/ruin. Thank Compton.
Finished welding and fabbing up the downpipe, wastegate, and dump tube. Also finished the oiling system. Now all thats left to do is install the new swingarm, shock, chain, and GM 3 bar sensor. However, I'm sure there will be issues once we try and start it, and we'll have to work through those as we go. Should make some noise soon!
quote:Why are you compressing the stock regulator?
Do you think you can get enough fuel without a FMU or RR regulator?
I've decided against using an external regulator. Only time will tell whether I'm getting enough fuel or not, but fuel pressure is fuel pressure. The motor doesn't know or care how much you spent, and as long as I'm using an in tank fuel pump, the pump will be the restriction in the fuel system, and I'd have to bypass the internal regulator regardless. I hope to have enough fuel for at lease 12 psi. If it doesn't work, I'll make sure to post it up.
All times are America/Va [ This thread is 9 pages long: 123456789Next» ]
 HOME
HOME NEW TOPIC