zx14mike
Zone Head
Posts: 891
|
 posted September 11, 2008 09:41 PM
Shane, this really is a kick ass thread, when are you gonn a get to the track next?
I think your kickin ass for how little seat time you've had, once you get it all sorted with the right gearing and chassis and some seat time i think you'll probably be real low nines.............i'm thinkin your used to launching on the 1000's where you gotta ride the clutch alot more once you get the right gearing and get used to tossing the clutch instead of riding it, i think your clutches will last a LONG time. could you tell if that gearing was enough for the bike or are you going to give it more time, your a big guy, you might like 16/44 or 17/46 and get more clutch life, how much do you ride on the street?
  
|
shane661

Needs a life
Posts: 11494
|
posted September 12, 2008 05:28 AM
 Edited By: shane661 on 12 Sep 2008 06:29 Edited By: shane661 on 12 Sep 2008 06:29
I did get used to riding Racheal's 1000 for a bit. And I think that got me in the habit of slipping the clutch out a ways. I also think the hydraulic setup on the 14 doesn't give the same kind of feedback that I am used to with the cable. I'm sure things will get better with more seat time on the 14.
As far as gearing, the first time out I was just +2 on the rear. This last time I was +4. I definitely noticed some wheelies at the end of first gear. But I think I may have been dragging the clutch and then engaging it hard at the end. I have a 16T sprocket that I'll be installing. My next track day at the 1/4 mile is in the beginning of October. I might get to the local 1/8th mile track before then.
I ride on the street a little. But mostly rides of 100 miles or less.
Shane
|
flatoutbu

Pro
Posts: 1054
|
posted September 12, 2008 06:08 AM
quote:
Yup what Scott said ... Use a fine file and clean up the hub , spray it out with brake clean and put it back together .. Don't remove the hub !!!
Shane as you know i have 800+ runs on my bike and 4 sets of clutchs and my pan has never been off ...The filter will get all the big stuff and what makes it though the filter is just clutch dust ..... I have had a few zx14 pans off that have had a few burned up clutchs and found NOTHING in the pan other that a lite film of clutch dust at the bottom of the pan ...In these motors i also pulled the pickup and found NOTHING inside the screen..
It it makes you feel better pull the pan but i feel it's a waste of time at this point ...Keep in mind that i have changed my oil 14+ times in 3500 miles and i use Mobil one 10 W 30 full Syn oil ..
+1
I burned up 4 or 5 clutchs in my bike and, when I pulled the pan and checked the screen...nothing. I have had the clutch in and out of my bike a million times until i found a set-up I liked. I went with the thicker steels kawi offers and busa fibers. I check it often and it looks good. My hub looks 10 times worse than yours and i have never replaced it. I do take a small file and knock the sharp edges off like the guys suggest.
____________
06 Blue 14
9.008 at 153mph @ 195 suited
|
Gixx1300R
Expert Class
Posts: 218
|
posted September 15, 2008 08:51 AM
|
tshultz

Zone Head
Posts: 556
|
posted September 15, 2008 03:14 PM
quote:
sweet!!
|
Gixx1300R
Expert Class
Posts: 218
|
posted September 16, 2008 05:24 AM
Shane get 2 dental picks to remove the clutch plates
|
Shane661
Needs a life
Posts: 11494
|
posted September 16, 2008 05:04 PM
Edited By: Shane661 on 17 Sep 2008 01:16
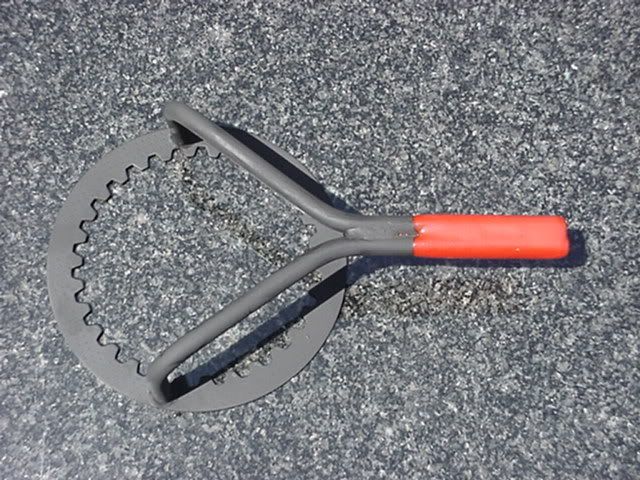
As you may recall, I was having some difficultly in removed a couple of the nuts on the bike. Specifically the countershaft sprocket nut, and the clutch hub nut. Even though I have a 26 gallon air tank and adequate compressor, the pack-in impact wrench would not budge the fasteners.
After some research I ordered this:

It's a lightweight unit with around 750 ft. lbs. of reverse torque. I hoped that it would be enough. I got it for a pretty good price off of Ebay, around $250 shipped. I also ordered a set of impact sockets to go with it, since I didn't want to break any standard sockets with the torque it has.
Well, it was more than enough. It didn't break a sweat with either fastener. At first I thought it wasn't going to get the countershaft nut...but then I realized that I had my regulator dialed down to 60 psi. After raising it up to 90 psi, the nut came loose with a few quick hits from the gun:
Hub removed from the basket:

Basket without hub:

Input shaft:

The coloration on the end of the input shaft really threw me. I guess it is from factory heat treating? The output shaft is the same blue on the end:


I have most of the parts I need to do the clutch/oil pan job, but a few key pieces won't be here for 5-7 days. I also have to get to the machine shop and have some pieces fabricated and some welding done for other parts of the bike.
I'd like to thank everyone who is following along for their comments and suggestions. In the case of the hub and pulling the oil pan, I am just taking the long route for my own peace of mind. I was tempted to leave both intact, but I knew it would gnaw at me.
The next Maxton event is in about one week, and I don't know if the 14 will be going. I'm sitting squarely on the fence about it. My first priority is to put the bike back together right, however long that takes.
Shane
|
lucky14

Pro
Posts: 1439
|
posted September 16, 2008 06:37 PM
I like everything you've done so far ......................... except for that last picture.
IMHO, you've gone too small on the cs sprocket. J/K LOL !! 
Thanks for the "story" and all the pictures. Prolly a lot of people like me that just check in for updates and never post, so keep up the good work.
BTW, I used my 3 year old Harbor Freight cordless impact to remove my cs sprocket. I was surprised that it did it after hearing all the horror stories here.
____________
You only need two tools: WD-40 and Duct Tape.
If it doesn't move and should, use the WD-40.
If it shouldn't move and does, use the duct tape.
|
Shane661
Needs a life
Posts: 11494
|
posted September 18, 2008 11:30 AM
Edited By: Shane661 on 18 Sep 2008 21:29
Ok, so I have the day off and I figured it was as good a time as any to pull the oil pan. First I had to remove the exhaust and drain the oil:

Without the bodywork, it went pretty quickly. I had that part of the job completed in about 20 minutes.
Before you can remove the pan, you must disconnet the oil sending unit. I used a 7mm wrench, since I didn't want to strip out the screw head if it gave me any trouble:

The pan came off easily. It was just a bunch of 8mm bolts and various brackets attached to it. Here you can see a good view without the pan:

The gasket also came off easily. Perhaps it could be re-used, but I am replacing it with new. You can see, however, that it wasn't one of those gaskets you literally have to scrape off to remove:

Here is the oil pickup/screen removed from the bike:

Upon inspection, it appears that there is some clutch material inside, caught in the screen:

I wanted to investigate further, but I'm not sure how or if the assembly comes apart. It doesn't seem to simply pop apart. I need to find out the best way to clean it before I can continue.
Shane
|
Shane661
Needs a life
Posts: 11494
|
posted September 18, 2008 12:20 PM
Here is a picture inside the pan. You can see quite a bit of presumably clutch dust and small chunks of friction material:

While none of this may cause a problem, I am glad I pulled the pan. If nothing else, for the learning experience and peace of mind. You can bet the oil pan and parts will be clean enough to eat off of before reassembly.
Shane
|
CrotchRocket

Moderator
Bracket Racing with Betsy
Posts: 8038
|
posted September 18, 2008 12:49 PM
Nice, feel better now Shane!!!
Now you have some piece of mind knowing clutch particles were not enough to cause any problem...
Oil & Filter, oil pan gasket.....$60 on Visa card
New Clutch plates, hub, 16 tooth front sprocket and reinstall OEM clutch Springs.....$325 on Visa card
Knowing that you'll never have to go through all that clutch mess again.....PRICELESS!!!
____________
Jason Miller StreetBike Seminars
*****DragRacers do it better, because they dont cut Corners*****

|
Shane661
Needs a life
Posts: 11494
|
posted September 19, 2008 08:38 AM
Edited By: Shane661 on 19 Sep 2008 16:42
Since I am planning to eventually install nitrous, I wanted a way to monitor exhaust gas temperature. I already have a/f capability, but I want to play things extra safe. I ordered the Innovate TC-4 to interface with the DL-32 unit I already have:

This package includes 4 thermocouples with it. I will be able to monitor EGT on all 4 cylinders. This should be of benefit when tuning as well. Each thermocouple has a bung that needs welded into the header:

Since the exhaust is already off of the bike for other repairs, this is a good time to get the welding done. One of the thermocouples didn't come with the bung and fittings, so Innovate is sending me parts. Unfortunately that means that I won't be able to drop the exhaust off at the welder tomorrow, as I doubt that I will be able to source the part locally by then.
Most people can get by without all of the fancy parts and monitoring systems (spray bars, progressive controls, logging, etc) on a dry setup. I am just very conservative.
Shane
|
billeason
Zone Head
Posts: 711
|
posted September 19, 2008 11:30 AM
Shane you will be glad you went to the trouble to install the egt. I have practicly the same set up on my dyno,and it will tell you more about fuel trim from one cylinder to the next better then anything i have found. We run two nos 14's and one has a 80 shot on it,and even with the spray bar i find differant fuel requirements per cyl. The hardest part was welding up headers for the differant bikes. Between your a/f moniter and egt's you will have some of the most accurite map info you can get. Nice write up by the way!! Bill.....
____________
bill eason
|
Shane661
Needs a life
Posts: 11494
|
posted September 19, 2008 05:46 PM
Edited By: Shane661 on 20 Sep 2008 02:17
I had been holding off on installing my Muzzy steering damper kit. Since I was just running at the local dragstrips, it wasn't required. But Maxton is in the Fall, so I needed to at least take a stab at it. I also had a good tank slapper landing a wheelie at the dragstrip last time out, so that gave me a little extra incentive.
So, here are the parts that came with my kit:

The kit is advertised as an easy install, but I knew it would take me awhile since I had never done one. Plus, with this many pieces there is a chance that parts may be missing or not quite right. I've found that a lot of aftermarket parts need to be re-engineered during installation. Also, I noticed that the instructions were for the older Hyperpro style kit.
Here is the assembled fork tube clamp. The instructions did not suggest a washer under the nut, but I felt it would be a good idea since otherwise the nut will eat into the aluminum of the clamp. The washer I used is less than ideal, but it is all that I had:

This next picture was an accident. But I like it:

Here is the fork clamp installed:

You need to insert two dowel pins. Mine were a little tough going in, so I used a little WD40 to ease the process:

Here is the base mount. It attaches on both sides of the steering head, and to the front tank cover mount:

Here it is installed on the bike:

I noticed that I had some extra parts, that I didn't see mention of in the instructions:

These are two spacer collars that are supposed to elevate the damper so that it won't drag the handlebar mounts when at full lock. They are shown in the picture on the front of the instructions (it has a picture of the Ohlins kit), but not on the packing list or in the assembly guide.
Another nice close up of the damper mount. I applied a small amount of grease to insure smooth movement:

Well, when I went to mount the unit, things went downhill. The included spacers seemingly did not raise the damper sufficiently to clear the handlebar on the left side. I didn't noticed until I had moved the bars a few times, which allowed the knurled adjuster to scuff the paint on the handlebar mount. Needless to say, I was disappointed.
There was no amount of fiddling with the damper that would elevate it enough to clear the bar. I ended up using some washers that I had laying around. Here you can see the stacked washers, about 3/8" of additional height was required for clearance:

Here you can see how little clearance that allows:

I can't slide the damper any further to the right as it is at the end of the pistons travel when at full lock:

The kit is advertised as front end strap friendly. Still, it is pretty tight where you need to slide the strap through:

Here it is, mostly completed:

I will need to get some decent washers and re-assemble some pieces. During that process I will fiddle a little more with the mounting and see if I can reduce the washer count. Perhaps with some minor adjustments things will fall into place.
It's been a long day, so I need to look at it with fresh eyes tomorrow.
Shane
|
dubious

Needs a life
Needs more time to ride!
Posts: 8442
|
posted September 20, 2008 07:32 AM
quote:
Since I am planning to eventually install nitrous, I wanted a way to monitor exhaust gas temperature. I already have a/f capability, but I want to play things extra safe. I ordered the Innovate TC-4 to interface with the DL-32 unit I already have:
This package includes 4 thermocouples with it. I will be able to monitor EGT on all 4 cylinders. This should be of benefit when tuning as well. Each thermocouple has a bung that needs welded into the header:
Since the exhaust is already off of the bike for other repairs, this is a good time to get the welding done. One of the thermocouples didn't come with the bung and fittings, so Innovate is sending me parts. Unfortunately that means that I won't be able to drop the exhaust off at the welder tomorrow, as I doubt that I will be able to source the part locally by then.
Most people can get by without all of the fancy parts and monitoring systems (spray bars, progressive controls, logging, etc) on a dry setup. I am just very conservative.
Shane
Now were talking!
This was news to me, I didn't know they made this, and a 4 input EGT system its exactly what i was looking for! I wonder if anyone makes a small 4 display screen for real time as well?
Thanks!
Lyle
____________
natural selection.....
destiny will overcome intervention.
Some are not worthy of the effort.
|
Shane661
Needs a life
Posts: 11494
|
posted September 20, 2008 08:27 AM
One more small item that I was too tired to post last night. For those who are planning to run a front strap, and concerned about aesthetics, consider covering the strap where it crosses the steering head. I ran a strap for about 7k miles on my 12R. Here you can see where it rubbed the paint off of the frame pretty good:

While it's not a huge deal, I thought I might try to minimize the effects this time. I had Canyon Dancer tie-down laying around, and I removed the velvet-like strap cover from it:

I slide it onto the front strap and mounted it on the bike, protecting the paint and finish of the steering damper mount, and the frame:

As I stated earlier, the Muzzy damper mount makes things really tight getting that strap in there.
Anyway, just a small item that I thought may be helpful for some of you.
Shane
|
dubious
Needs a life
Needs more time to ride!
Posts: 8442
|
posted September 20, 2008 08:33 AM
hmmm, yes
I found its very tight to run a damper and strap no matter what damper you use...
I have to give you props for this post. I am too busy getting it done usually to take pictures, let alone post them....
very selfless of you.
Good work.
____________
natural selection.....
destiny will overcome intervention.
Some are not worthy of the effort.
|
Shane661
Needs a life
Posts: 11494
|
posted September 20, 2008 10:57 AM
Edited By: Shane661 on 20 Sep 2008 19:42
I went over my steering damper installation this morning and found that I did not have the alignment correct. If you are off by even 1/8" on the height of the fork clamp it can cause the results that I encountered.
I took everything back apart and reassembled. I was able to eliminate the additional spacers that I had installed. I was able to do everything using the parts in the kit, with great results. Just keep in mind to take your time, and you will need to figure a few things out as you go. Pay close attention to how tight the clearance is on each end of the damper when at full lock. This is why it is easy to encounter clearance issues. Here is the finished products:


There was another plastic baffle that I wanted to remove, but I was waiting until I had the exhaust off. This piece flaps around like crazy at high speeds if you are not running the lower fairings:

You can see how much more open it is now:

This is probably a good time to remove the kleen system from the top of head. I'll have to pick up some block-offs.
Shane
|
Shane661
Needs a life
Posts: 11494
|
posted September 20, 2008 11:13 AM
Edited By: Shane661 on 20 Sep 2008 19:23
I have been pondering a Sidewinder setup, so I took some measurements. If you run a 2" pan and a straight suspension link you can drop the bike about 1 3/4" in the front (fender clearance might limit this) and less than 1" in the rear, when compared to a standard setup with the drain plug moved. Here are some pictures that illustrate why you can't get much lower in the rear. The frame is the lowest point, no matter what sort of suspension you use:


The oil pain looks to be under 4", once you relocate the drain plug:

I'm not sure that it is worth it for a "hobby" level racer like me. A straight link, sidewinder, and oil pan will set you back a lot of money. I could probably add a little ballast up front and get some decent results, at about $2k less.
Shane
|
Shane661
Needs a life
Posts: 11494
|
posted September 20, 2008 11:38 AM
quote:
Now were talking!
This was news to me, I didn't know they made this, and a 4 input EGT system its exactly what i was looking for! I wonder if anyone makes a small 4 display screen for real time as well?
Thanks!
Lyle
Check this out:

http://www.innovatemotorsports.com/xcart/product.php?productid=16301&cat=0&page=1
Looks like a programmable LCD display for interface with a data logger. I bet you can display all egt temps on the screen at once. Interesting looking product.
Shane
|
dubious
Needs a life
Needs more time to ride!
Posts: 8442
|
posted September 20, 2008 12:06 PM
More selflessness!
Thanks Shane!
I will have to check it out!
____________
natural selection.....
destiny will overcome intervention.
Some are not worthy of the effort.
|
Shane661
Needs a life
Posts: 11494
|
posted September 20, 2008 04:06 PM
I guess I have been feeling somewhat motivated over the last 24 hours. I went ahead and tackled a few other items. First up was installing a 16T countershaft sprocket. I ordered a Kawasaki oem sprocket off of the old Zephyr 1100. It has rubber vibration dampers that keep the sprocket from howling. Top parts old, bottom parts new:

It went on without a hitch. I put a very light coating of anti-seize on the threads of the output shaft. I tightened the nut to around 92 lbs. and then flattened off the washer on one side of the nut:

I then re-installed the sprocket cover. I took time to clean everything up while I was doing this; that area gets pretty messy from chain lube. After I completed that I moved on to the rear wheel. Since I changed the gearing I had to re-adjust the chain.
With my gearing sitting at 16/45, it was definitely time to install the Speedohealer. Otherwise I might only see 145 mph on the bike before hitting the limiter! The pick-up is located on the cover of the countershaft:

If you trace the wire from there, you will see where you need to connect the leads from the Speedohealer:

I ran the cable to the healer right up the factory wiring loom on the side of the bike:


I used some pretty stout 3m "velcro" to mount the part. This is not your everyday velcro, the knobs are hard plastic!:

I also installed the speed recall button. It hs a lot of extra wire, so you will need to tie that up out of the way. Here is the final installation:


With this location I can program it without removing any panels. It is also easy to access the recall button. I didn't try to calibrate it yet since the bike is not roadworthy.
Shane
|
wrenchhead

Novice Class
Posts: 76
|
posted September 20, 2008 05:36 PM
shane,
Keep up the good work, looks like you are doing quality work and taking time to take pictures along the way to share with all of us. THANKS!! although i have done very little to my bike compared to what you have done your pictures are very helpful.
|
Shane661
Needs a life
Posts: 11494
|
posted September 23, 2008 06:05 AM
Edited By: Shane661 on 23 Sep 2008 14:11
I'm in a spot right now. Maxton is this weekend, and I do have the parts to assemble the bike. Unfortunately, I don't have time to get the machine work and welding done. So, that would mean putting the bike together to race, and having to tear it all back apart in a week. Meaning, exhaust, oil pan, and bodywork. On top of that, I have to change the tires and gearing, and then switch them back for dragracing on 10/3.
Otherwise I can go to Maxton this weekend, steal a pass or two on Racheals turbo, and maybe even campaign her old 1000 Honda Superhawk (Hey, I have seen 147 official mph on that baby!).
At any rate, I have to make a decision today. The logical thing to do is to wait until the end of October to race the bike at Maxton...then again, racing itself is not very logical. 
Shane
|
Shane661
Needs a life
Posts: 11494
|
posted September 23, 2008 08:10 AM
Well, I've made up my mind. I'm going racing! 
I've got a lot to get done before loading up on Thursday. Here is how the bike sits now:


I just pulled the wheels and took them up to the shop to have the tires changed. I normally run Shinkos. A 60 series in the front and an Ultra Soft in the rear. It's pretty common knowledge that Ultra Soft is a bad tire for top speed runs. It gets hot too fast. I don't even risk running the Shinko 003's at Maxton. I am having the stock Bridgestones mounted back up. The wheels already have metal valve stems installed, so that is not a concern.
I have the following to do before the bike can be run at Maxton:
Install new clutch hub and clutch
Clean oil screen and re-install oil pan
Change oil & filter
Install exhaust
Change gearing
Calibrate Speedohealer
Install bodywork
Safety wire axles
Wire up kill tether
There are a few other small items, but this will get me through tech and down the racetrack.
I've only made two high speed runs this year, and they were both on Racheal's Turbo (180 & 190 mph). I'd like to get some seat time on my own bike for a change!
Shane
|
|
|
 HOME
HOME NEW TOPIC